
Using HubSpot forms on your Wix site can seamlessly sync contact information from your site into HubSpot.
1. Create your Code in HUBSPOT
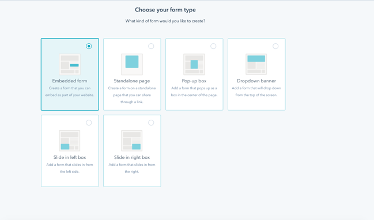
- To start, create a form in HubSpot. Choose to create an embedded form
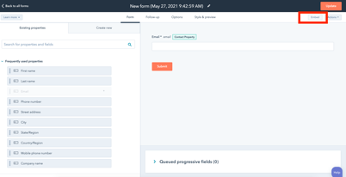
- After the form is created to your liking, hit the “embed” button in the top right corner
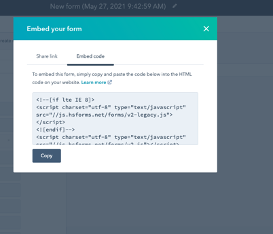
- A line of code will pop up when you click the embed code view of the pop-up that displays. We will copy this code to paste into Wix
2. Add a Custom Code to Wix
- Now, go to the back end of your Wix site. On the left-hand side, you will see a Settings tab. Select this, and scroll down to where it says “Advanced.”
- In the Advanced box, you can see an option for “Custom Code” select this to add our custom code to the site.

3. Embed Code to Wix
- After you select custom code, you can see that a few tracking codes have been added already. You can select the “Add Custom Code” Button in the top right corner, or you can see the “Head,” ”Body –Start,” or “Body – End,” which is where on the site we can add the form or any code.

- You can see that we have tested out an HS form in the “Body End” It is currently turned off, but we can update this with our code. Select the three dots on the side, and an “edit settings” option will appear.
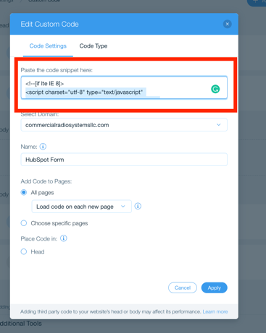
- Under “Code Settings,” you can paste the code that you got in HS. You can also name whatever you want and choose which pages or if the form will display on all pages.
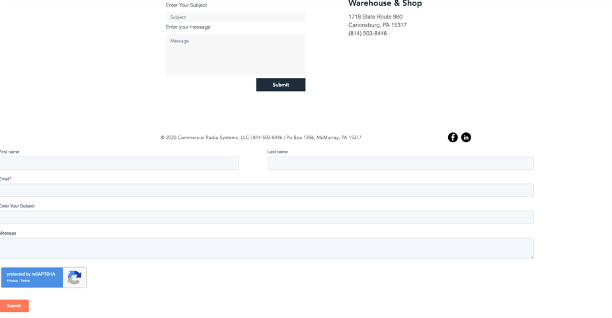
4. Testing your form
- When we turn this form on, you can see that it will display at the bottom of the page. In this example, it is below the contact form that we have already added to the WIX site. Now that this code is embedded, we want to remove the WIX form.
5. Updating a pre-made Wix form
- Back on our main dashboard, we select “content manager.”
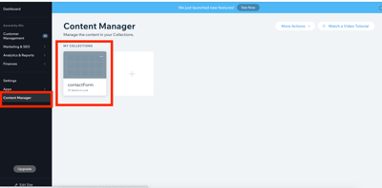
- From there, we can see the contact form that is currently on the site. If you click the dots in the top right corner of this form, we can edit this and open the content manager.
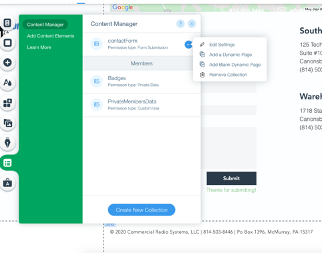
- From there, we can edit this form in the content manager tab. In this instance, we would be removing this form because our HS form is now embedded on the site.